Print Screen to Paint to Word
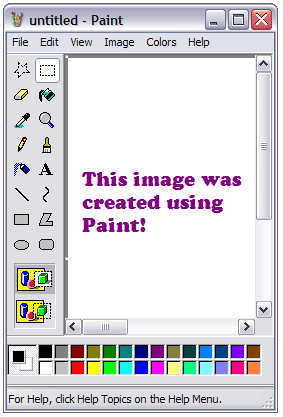
Step 1 - Open Paint. Click on the Start button (bottom left corner of your screen), slide up to Programs, then slide up to Accessories, and finally slide over and down to Paint .

Step 2 - Paste the image of your screen in the Paint window by holding down the Ctrl key and then tapping one time on the V key. Yes, you can go to the Edit menu to select paste, but which Edit menu? If you have been following directions you will see two Edit menus in the top left part of your screen. One, the lower one, is only a picture of an Edit menu.
Step 3 - Use the Paint Tools to Edit the Image. The buttons are identified below:
| Freeform Select | Color Picker | Airbrush | Rectangle | ||||
| Select | Magnifier | Text | Freeform | ||||
| Eraser | Pencil | Line | Ellipse | ||||
| Fill with Color | Paint Brush | Curve | Rounded Rectangle |
| Use with Select, Freeform Select, and Text When you select a part of an image to move to another location, or text to put on the image, the background of the selected image will be opaque | Use with Line and Curve Change the thickness of the line | Use with Brush Determine the shape and size of the paint brush | |||
| Use with Select, Freeform Select, and Text When you select a part of an image to move to another location, or text to put on the image, the background of the selected image will be transparent | Use with Rectangle, Freeform, Ellipse and Rounded Rectangle The top rectangle draws a shape whose inside will be transparent. The middle rectangle draws a shape whose inside will be opaque. The bottom rectangle draws a shape filled with the selected color | Use with Airbrush Determine the size of the airbrush spray | |||
| Use with Eraser Change the size of the eraser. If you need to erase a single pixel, use the pencil with background color | Use with Magnifier Set the amount of magnification to be used |
Step 5 - Open Paint and paste what you stored in the clipboard into the Paint screen. Some versions of paint will expand with the image, others will display a Paint dialog box with the message "The image in the clipboard is larger than the bitmap. Would you like the bitmap enlarged?" The answer to that is Yes.
Step 6 - You may have to scroll down in the Paint window to see both the Great Seal and the Tennessee facts button. To make more working space select parts of the image that you will not be using and press the delete key. The select button may look as if it is already selected, but you must click on it to use the tool to highlight a part of the image.
Step 7 - After you have cleared some working space in the middle of the screen, use the Select tool to draw a box around the blue Tennessee Facts button. Put your cursor in the middle of the boxed-in image, then click and drag the button into the middle of the white pace.
Step 8 - If the Select tool button is still selected, choose the button that makes the background transparent. Draw a box around the Great Seal and move it so that it covers the top right corner of the Tennessee Facts button. Don't let go of the image until you have it exactly where you want it. If you drop the image some place that do not want it, go to the Edit menu and select Undo, and then try it again.
Step 9 - Use the Select tool button to draw a box around the new image you created, and then copy the image.